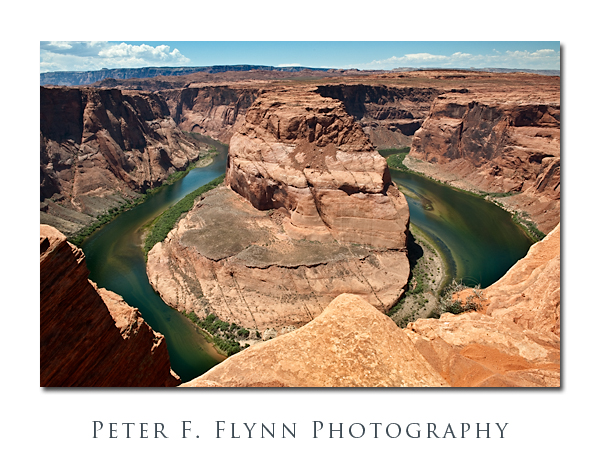
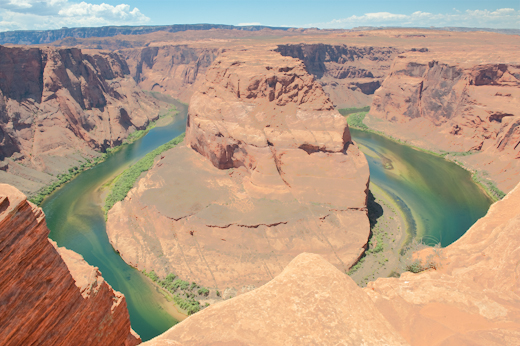
The image we will consider in this entry is the often-photographed Horseshoe Bend site near Page, AZ. The overlook is located about 6 miles south of Page on US 89, at the end of a 0.75 mile hike (one-way) over rolling sandy terrain. The final processed image is shown below.
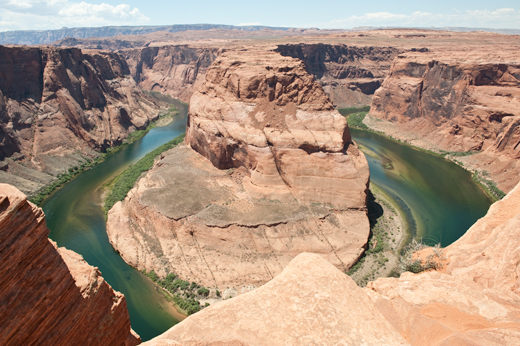
The source image (shown below) was was recorded on July 22, 2009, at about 14:40 MST, using the Nikon D700 and the AF-S NIKKOR 24-70mm f/2.8G ED lens at 27mm. Exposure was f/16 and 1/125s, ISO 200. Minimal processing of the RAW image was conducted during the conversion.
The image exhibits the anticipated washed-out attributes that we would anticipate given the time of day at which the image was recorded. In this instance, as we so often find, photographing this amazing scene during the Golden Hour is simply not tractable, since long shadows would fill the canyon, generating an uninteresting image. Our only option is to record the image when the sun is relatively close to its zenith, and hope to enhance detail and color post-capture.
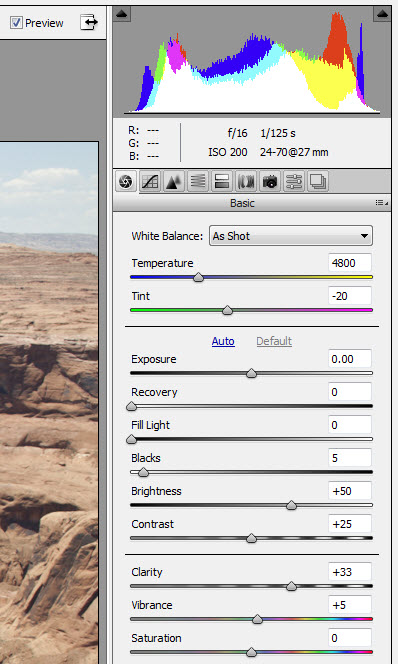
Below, I include a screen capture of the ACR Raw conversion interface below to illustrate that although the image it pretty washed out, the histogram indicates that things aren’t too bad – this is common is images recorded near midday on sunny days.
There are several things would should like to improve. The clouds on the horizon are attractive, but a bit blown out. There is dramatic color variation, but it definitely could be much better. Specifically, both contrast (luminosity) and color variation would be improved by both darkening the sandstone surfaces throughout the image and by expanding the subtle range of color present.
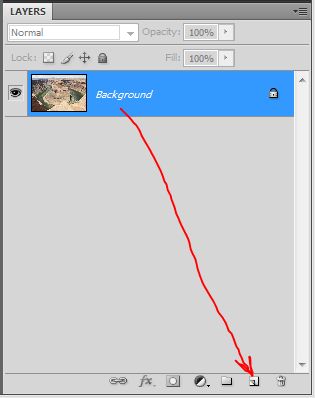
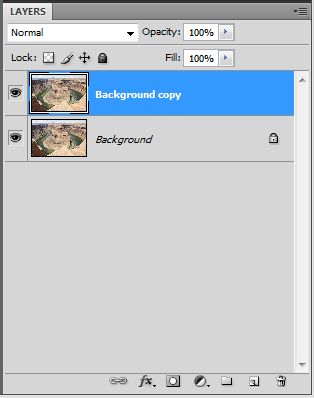
We’ll tackle the clouds/sky issue first. We begin by copying the Background layer to generate the Background copy layer.
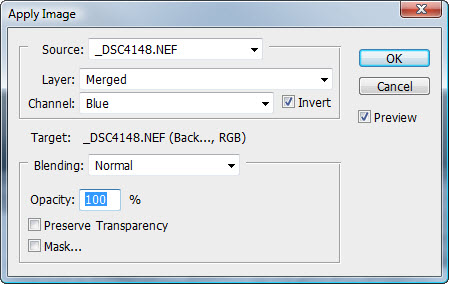
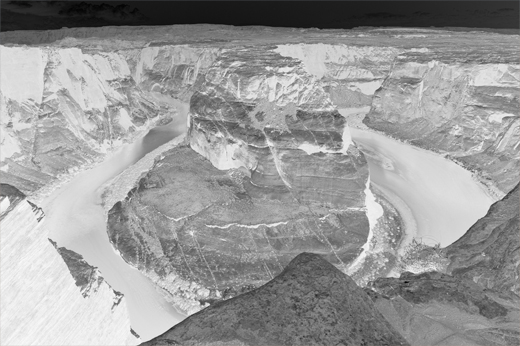
The next move is difficult to motivate, but the results are compelling. Apply the blue channel of the RGB image to the R,G, and B channels in Normal blending mode – select Image > Apply Image… Note that the Invert box is checked – this is important. See the dialog box and resulting image below.
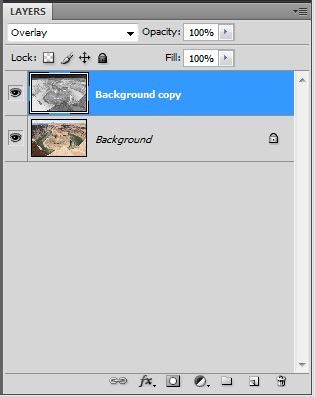
Not yet clear where this is headed? Try changing the blending mode of the Background copy layer from Normal to Overlay blending mode as shown below.
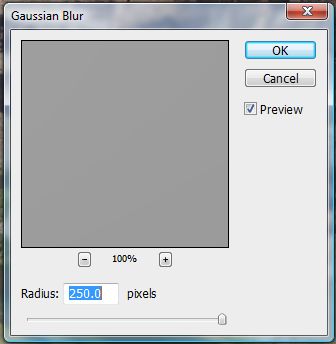
Although you may be able to see that we have increased definition in the clouds, the image still looks pretty strange., and specifically there is an odd loss of resolution throughout most of the image We clear this up by blurring the Background copy Layer. Make certain that the Background copy layer is selected (the layer icon will turn blue if you are using default settings). Then select Filter > Blur > Gaussian Blur… The Gaussian Blur dialog box will appear, and allow you to vary the radius parameter.
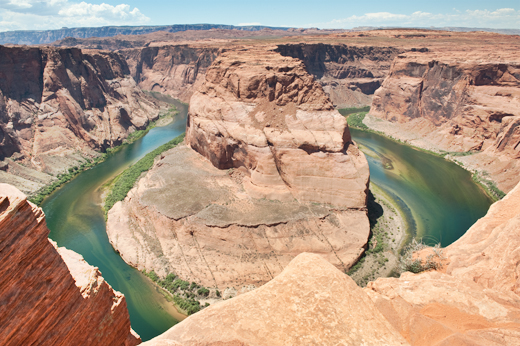
The proper setting of radius depends on the resolution of the image. As you increase radius, the image will gain back the original resolution of the source image, but the clouds – and – other highlight regions of the image – will have improved definition. For this 12MP image, I had to apply the maximum value, 250 pixels, twice. The Photoshop engineers definitely need to increased the range of the radius parameter to accommodate current and future image sizes. The resulting image is shown below.
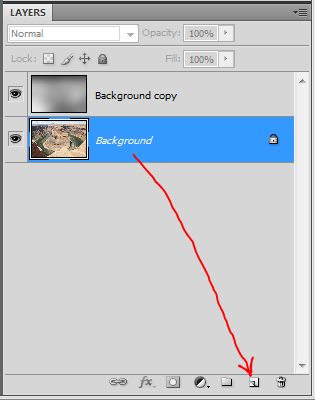
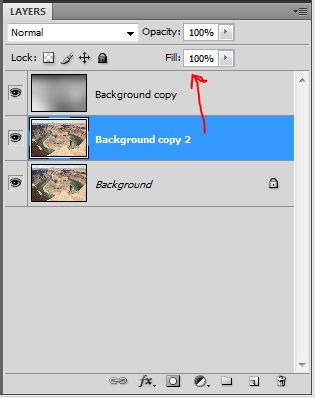
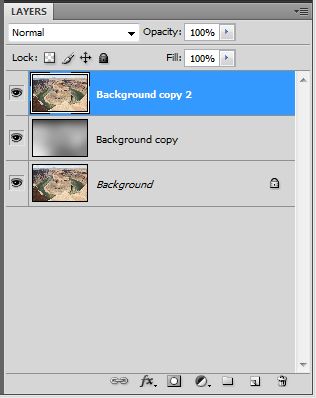
Careful comparison between the working image shown above and the original image indicates that the Overlay procedure has left the image much lighter. We restore the original luminosity by first copying the Background image to generate a new layer named Background copy 2, and then draging that new layer to the top of the layers stack as shown below.
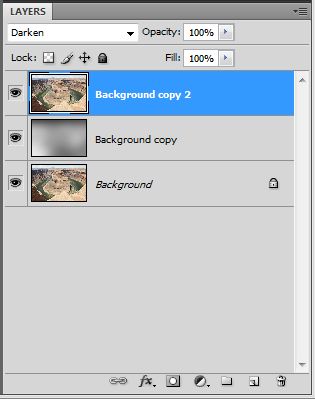
Of course, since the blending mode of the new layer is Normal, the view you now have of the image is exactly the same as when you started – placing any image with blending mode set to Normal at the top of a layer stack simply displays that image. Things get interesting when you convert the blending mode to Darken as shown below.
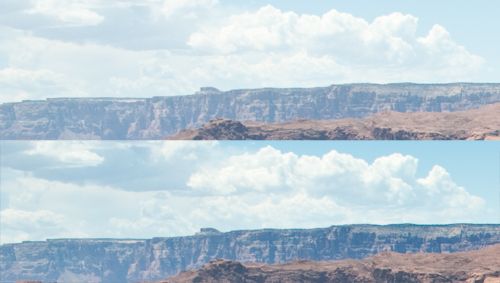
The influence of the processing becomes clear when we view a section of the sky as shown below – original image on the upper half.
Note that not only has the definition in the clouds improved, but the canyon walls have also been enhanced. This is a good stopping point for the current entry. Stay tuned for part III.
One final note. I didn’t invent any of the methods discussed in this entry. My approach is a combination of a wide range of influences, including ideas discussed by Martin Evening, Bruce Fraser, Scott Kelby, Dan Margulis, Deke McClelland, Jeff Schewe, Rov Sheppard, and a number of others – all of the folks listed by name publish excellent texts on image processing and are well worth owning.
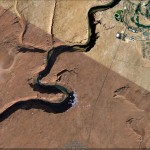
An image of the Horseshoe Bend area is shown below courtesy of Google Earth Imaging.
Copyright 2010 Peter F. Flynn. No usage permitted without prior written consent. All rights reserved.
Tags: AZ, blending modes, Horseshoe Bend, overlay blending mode, Page

Looking forward to trying this out. I remember you mentioning something similar when I saw you in CA last year.
Hi Wade,
It’s pretty easy to implement, but making up simple actions for overlaying with the R, G, or B channels makes life easier. Lemme know how it turns out.
Cheers,
P.